New Feature: Mount S3 Buckets to EC2 Using Amazon S3 Files
Amazon S3 Files is a service that allows you to directly mount S3 buckets as an NFS file system on compute resources such as EC2. Data remains stored in S3 while enabling typical file operations (ls, cp, cat, etc.) for reading and writing.
What is S3 Files?
S3 Files is a shared file system built on Amazon EFS, providing file system access to data stored in S3 buckets.
Key features include:
| Item | Description |
|---|---|
| Protocol | NFS 4.1 / 4.2 |
| Supported Compute | EC2, Lambda, ECS, EKS |
| Concurrent Connections | Up to 25,000 compute resources |
| Read Throughput | Up to TB/second |
| IOPS | Over 10 million / bucket |
| Encryption | TLS (in transit) + AWS KMS (at rest) |
| File System Features | POSIX permissions, file locking, read-after-write consistency |
How It Works
S3 Files automatically loads accessed data to high-performance storage and provides it with low latency.
- Small Files (default less than 128 KB): Read directly from high-performance storage
- Large Files (1 MB and above): Stream directly from S3
- Writing: Write to high-performance storage and automatically sync to S3
Data on high-performance storage is automatically deleted after a certain period of inactivity (default 30 days, configurable from 1 to 365 days).
Prerequisites
- AWS Account
- EC2 Instance (Linux)
- S3 Bucket (in the same region as EC2)
- Two IAM Roles
- For creating the file system: Permissions to read/write to the S3 bucket
- For the EC2 instance: Attach the
AmazonS3FilesClientFullAccessmanaged policy
- Security Group: Allow communication on NFS port 2049
Creating IAM Roles
Two IAM roles are required for S3 Files.
1. Role for Creating File Systems
Automatically created when using the management console, so this step is not necessary
This is the role that allows S3 Files to access the bucket.
# Create role
aws iam create-role \
  --role-name S3Files-FileSystem-Role \
  --assume-role-policy-document '{
    "Version": "2012-10-17",
    "Statement": [
      {
        "Effect": "Allow",
        "Principal": { "Service": "s3files.amazonaws.com" },
        "Action": "sts:AssumeRole"
      }
    ]
  }'

# Attach S3 Files client policy
aws iam attach-role-policy \
  --role-name S3Files-FileSystem-Role \
  --policy-arn arn:aws:iam::aws:policy/AmazonS3FilesClientFullAccess
Specify this role with --role-arn when creating the file system.
2. Role for EC2 Instance
Failure to attach the IAM role will result in mount failure
Create the following role in CloudShell.
# Create role
aws iam create-role \
  --role-name EC2-S3Files-Role \
  --assume-role-policy-document '{
    "Version": "2012-10-17",
    "Statement": [
      {
        "Effect": "Allow",
        "Principal": { "Service": "ec2.amazonaws.com" },
        "Action": "sts:AssumeRole"
      }
    ]
  }'

# Attach S3 Files client policy
aws iam attach-role-policy \
  --role-name EC2-S3Files-Role \
  --policy-arn arn:aws:iam::aws:policy/AmazonS3FilesClientFullAccess

# Create and attach instance profile
aws iam create-instance-profile \
  --instance-profile-name EC2-S3Files-Profile

aws iam add-role-to-instance-profile \
  --instance-profile-name EC2-S3Files-Profile \
  --role-name EC2-S3Files-Role
Attach this role to the instance.
Setup Steps
1. Prepare the S3 Bucket
Create a general-purpose bucket in the S3 console. You can also use an existing bucket.
However, versioning must be enabled for the bucket.
2. Create the File System
If Creating from the Console
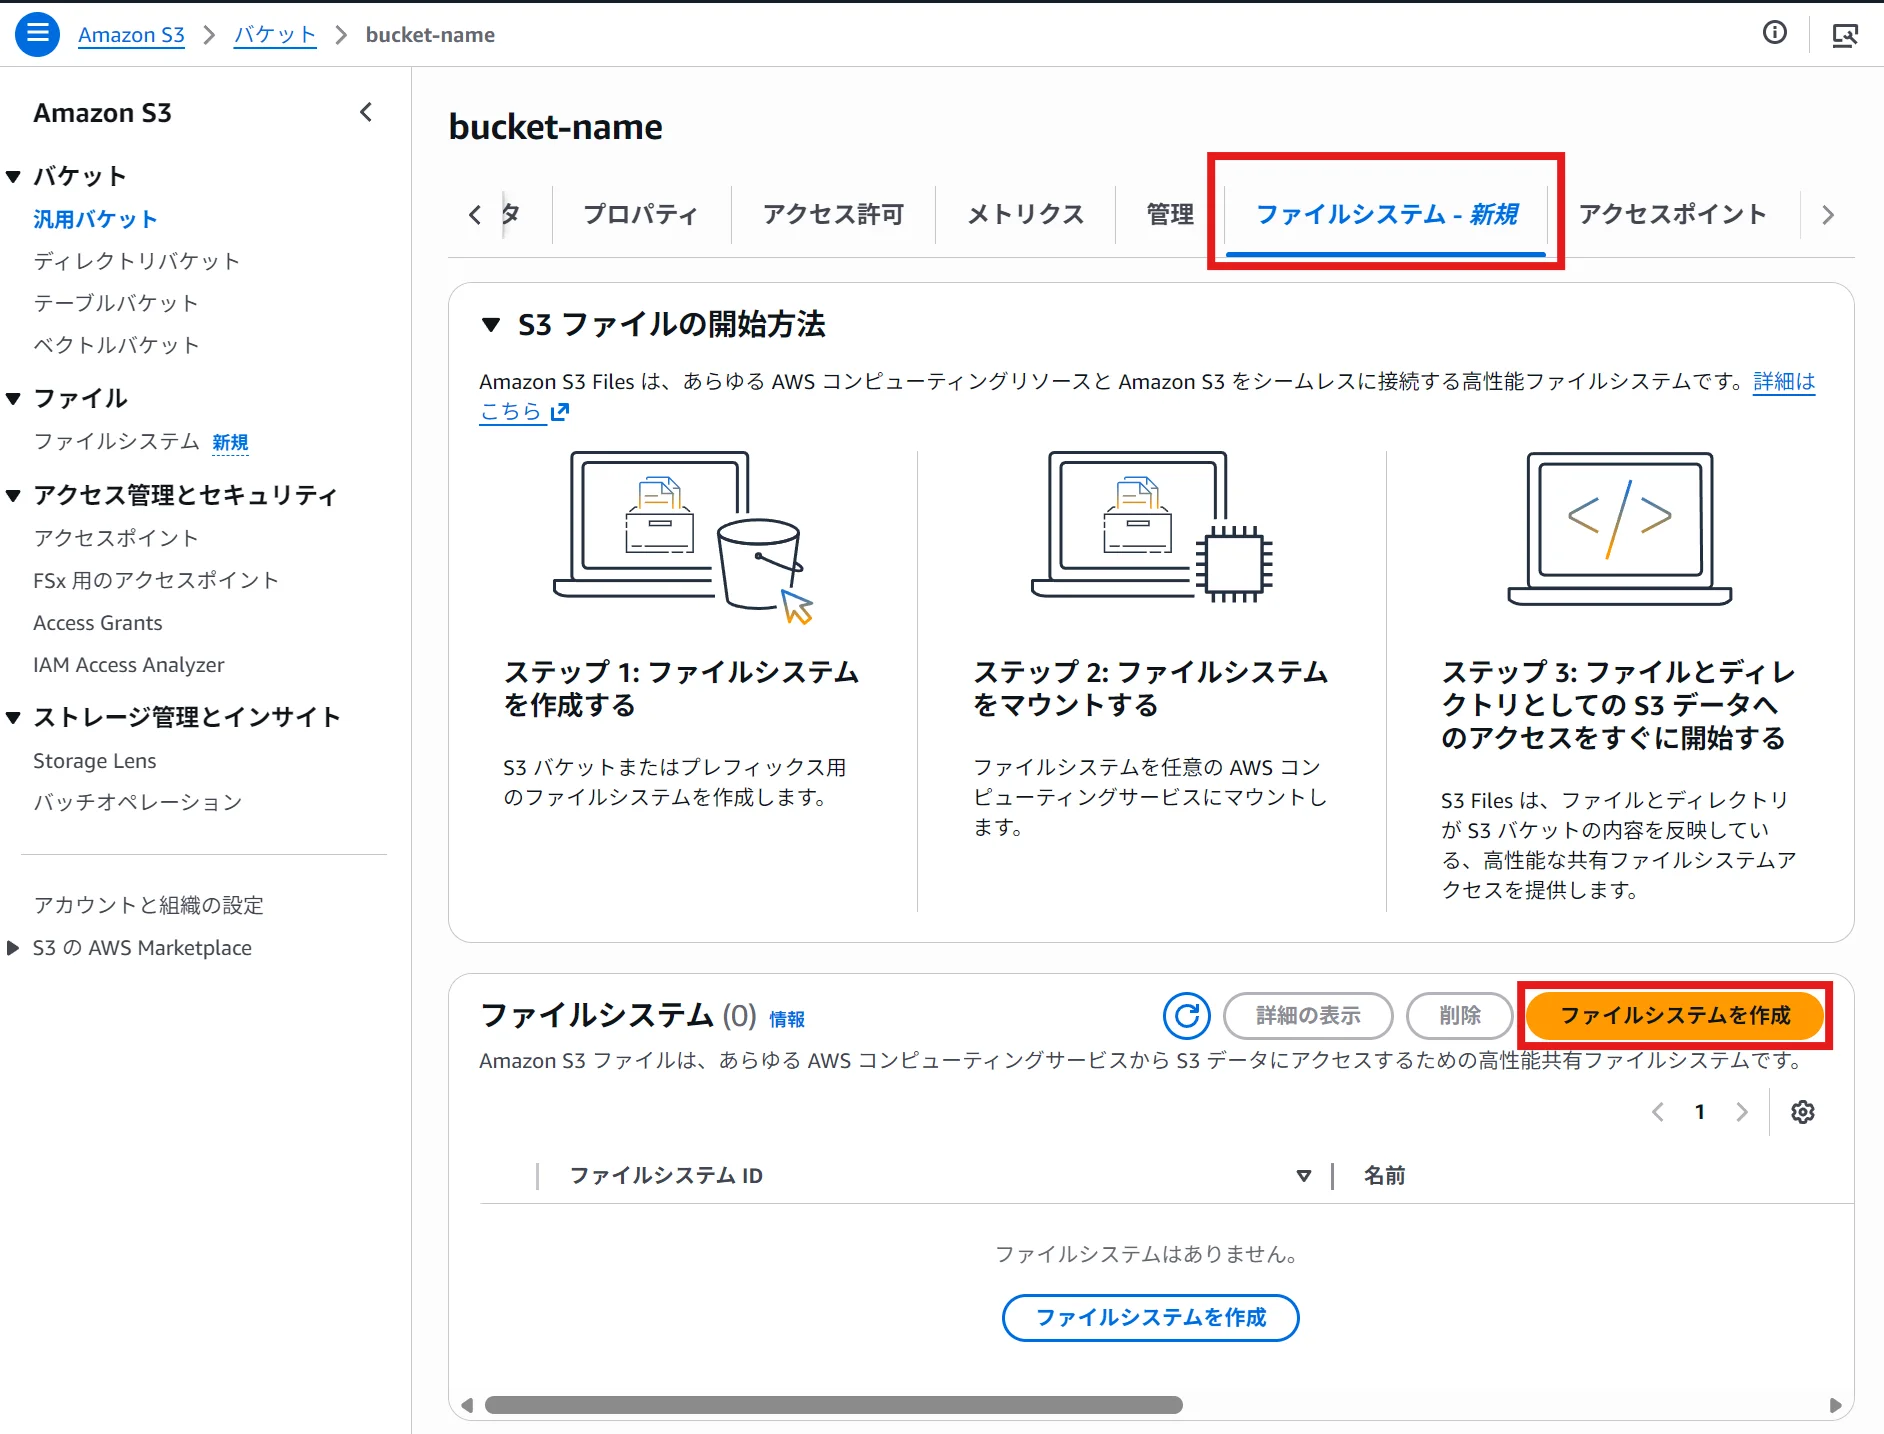
- Select the bucket in the S3 console
- Click on the "File Systems" tab → then click "Create File System"
Creating from the console automatically creates mount targets and access points in all AZs.
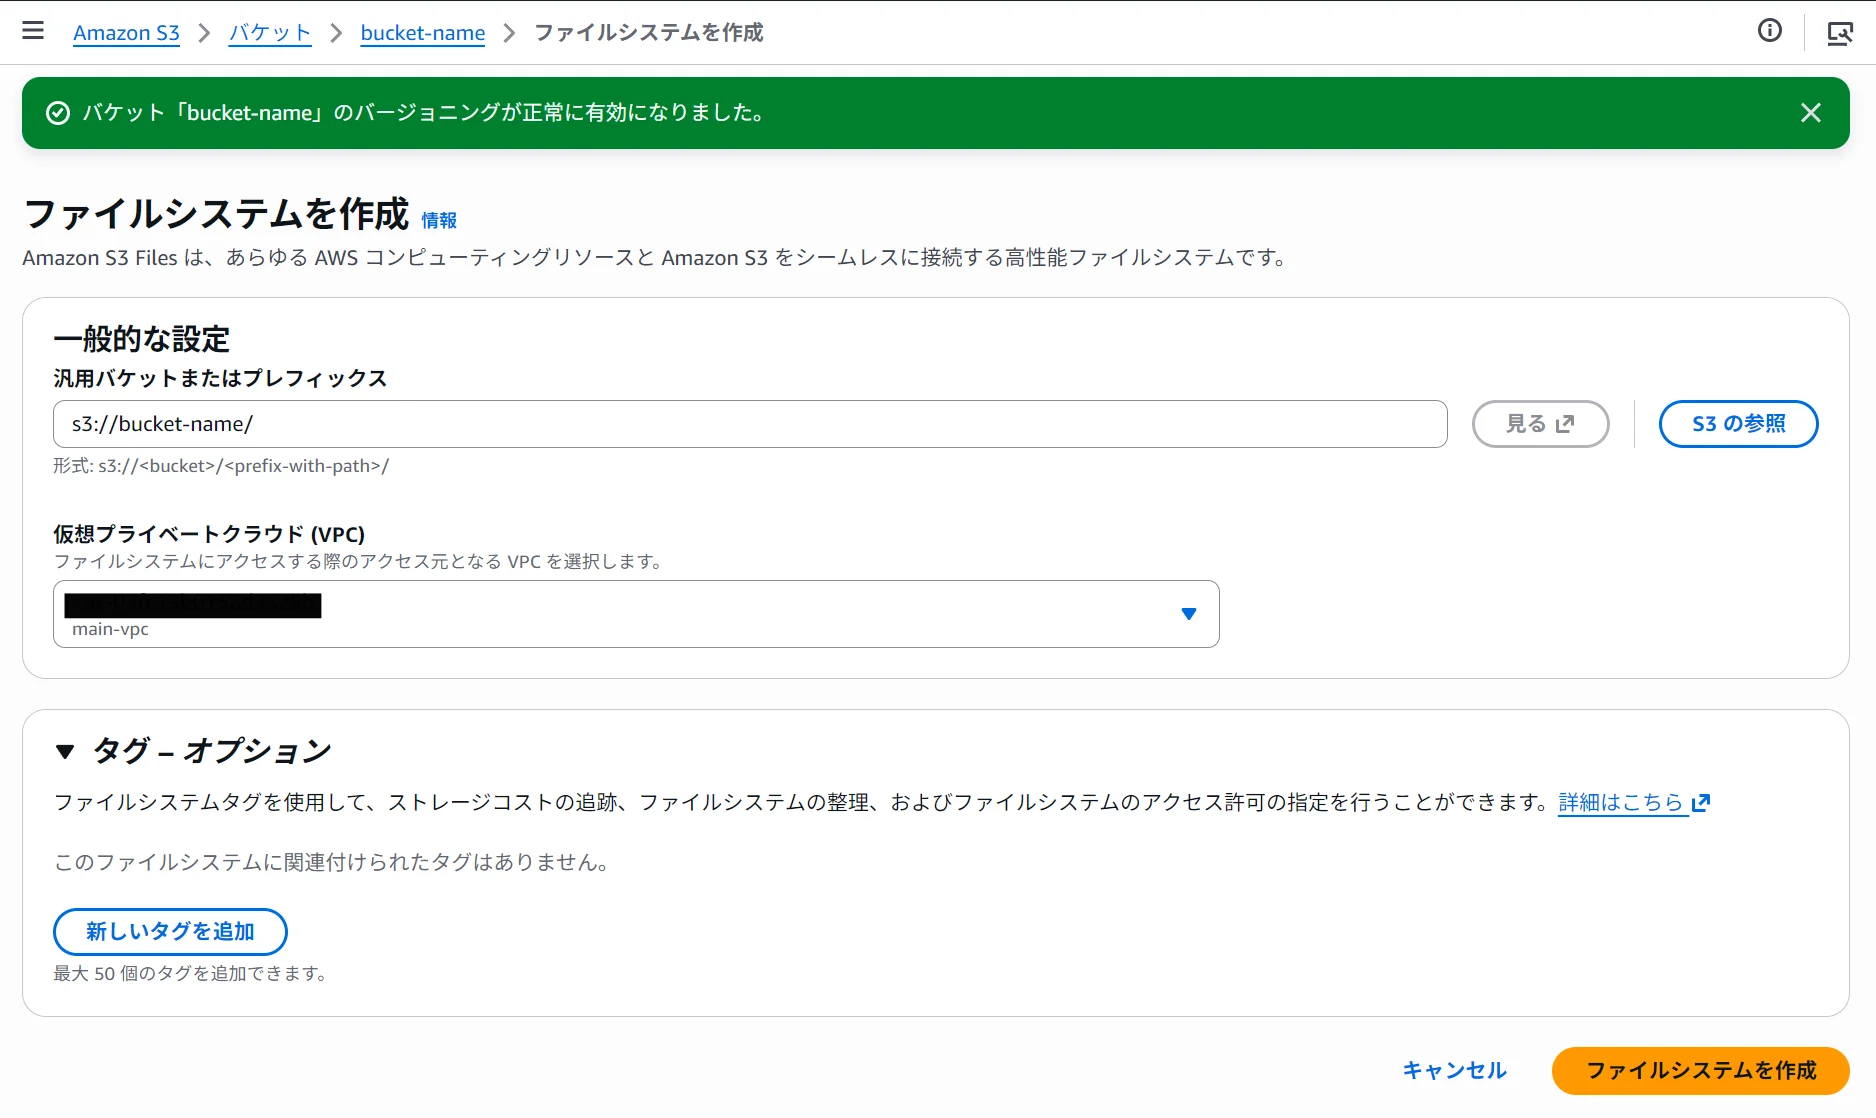
- Specify the prefix and VPC, and click "Create File System."
Record the output file system ID (e.g., fs-0123456789abcdef0).
3. Mount on the Instance
In the terminal, execute the following:
# Create mount point
sudo mkdir /mnt/s3files

# Mount
sudo mount -t s3files fs-0123456789abcdef0:/ /mnt/s3files
If the mount fails, execute the following command and retry.
sudo dnf install -y amazon-efs-utils # Amazon Linux, RHEL
# sudo apt install -y amazon-efs-utils (Ubuntu, Debian)
If there is connectivity issue when executing the dnf command, set up an S3 endpoint (gateway) and assign it to the same AZ as the instance.
Ensure that the route table for the S3 endpoint matches the subnet where the instance is located.
To verify the mount:
df -h /mnt/s3files
You should see output similar to the following:
Filesystem      Size  Used Avail Use% Mounted on
<s3files-dns>   8.0E  129M  8.0E   1% /mnt/s3files
4. Perform Functionality Checks
cd /mnt/s3files

# Create a file
sudo sh -c 'echo "Hello, s3 Files!" > test.txt'

# Read the file
cat test.txt

# Create a directory
sudo mkdir test-directory

ls -la

# Copy the file
sudo cp test.txt test-directory/

cd test-directory/

# Check the file list
ls -la
The file you wrote will sync to the S3 bucket in about one minute. You can verify that the object has been created in the S3 console.
aws s3 ls s3://<bucket-name>/
Setting Up Auto-Mount
To maintain the mount after a reboot, add the following line to /etc/fstab.
# Add to /etc/fstab
fs-0123456789abcdef0:/ /mnt/s3files s3files _netdev,nofail 0 0
_netdev is an option that ensures the mount occurs after the network connection is established and is required. Adding nofail prevents the instance from becoming unbootable in the event of mount failure.
Pricing
The pricing for S3 Files is composed of the following components:
- High-Performance Storage Usage: The storage fees for data on the file system
- File System Access Fees: Read and write operations to high-performance storage
- S3 Request Fees: Only the S3 GET charges apply when reading files over 1 MB directly from S3
It operates on a usage-based pricing model with no provisioning required, and according to AWS, it can achieve cost savings of up to 90% compared to traditional data copying between S3 and file systems.
Summary
- S3 Files allows you to mount S3 buckets as an NFS file system on EC2
- Data remains stored in S3 while enabling typical file operations like
ls,cat, andcp - Low latency is achieved through caching on high-performance storage, and data that goes unused is automatically evicted
- Configuring auto-mount using
/etc/fstabensures persistence after a reboot
Loading...